StreamBOX-LiveCD is a selfmade, KNOPPIX based Boot-CD, which is designed for radio stream broadcasting through the Internet, in .ogg and .mp3 format.
It aims to simplify the whole streaming process, offering a complete Operating System bootable from cd, focusing on utilities and documentation concerning radio broadcasting through the Internet, while offering the complete functionality of a Debian GNU/Linux OS:
- it's a live-CD: no need to install it on the hard disk
- it's based on Debian and Knoppix: a complete range of free to use, Open Source software and the simplicity of the KDE grafical environement
- it's made for radio streaming: all the tools you need in the most "easy to use" flavour and documentation references
Notice: the StreamBOX live-CD is suited for Intel compatible x86 processors; it is NOT working on Machintosh PowerPC or AMD64 computers!
You can download StreamBOX directly from the streambox home page in .iso format (699MB) and burn it to a CD with your favourite CD burner software.
Being a compressed .iso file, you should choose the "burn ISO image" option to be able to use it once copied over an empty CD.
Insert the StreamBOX live-CD into the CD-drive and then start (or reboot) the computer.
If the StreamBox live-cd is not starting automatically, you will have to change your boot settings in the BIOS. Usually this can be done by pressing the del or F2 key right after you turned on the computer. Set the CD- or CD/DVD-drive as the first boot option!
Right after the computer BIOS boot, your computer will begin to load the StreamBOX OS from CD. First of all you will be asked for special boot parameters for the OS itself.
You can either leave these boot options as they are by default (default language setting is EN, english), or choose special boot options: pressing F2 or F3 you will have a list of boot parameters.
Mind your language settings: if you want the available standard settings in a language else than the english/american one, you should write in the boot field:
- streambox lang=de (german settings)
- streambox lang=fr (french settings)
- streambox lang=es (spanish settings)
...and so on. Supported language settings are: us, cs, da, de, es, it, nl, pl, sk, and more.
Once you're finished with the boot options, pressing enter the Streambox Live-CD will boot. A Debian GNU/Linux Operating System will be loaded from the CD, not affecting your hard-disks.
All the hardware should be recognised and configured automatically, and you will soon be able to see the StreamBOX Webpage, which will be the starting point of your StreamBOX session.
Notice: If you are using a laptop and are not able to see anything, then you can try rebooting and typing streambox vga=771 at the boot options.
For a complete overwiew of the possible boot options, please refer to the knoppix wiki webpages.
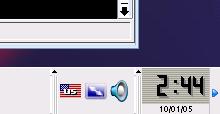
Once the graphical interface (X Windows System) has been started, on the lower right part of the screen you will be able to see a little flag representing the keyboard layout that you are using.

If you want to choose a different keyboard layout, just left click with the mouse on the flag: this will switch between EN, DE, and FR. If you need a keyboard layout else than those, right click the flag and select "Configure": there you will be able to choose among a vaste list of settings.
If your Local Area Network has a DHCP service, then the StreamBOX live-CD configures the network settings automatically on start up.
If this didn't success, or you need different network settings, clicking on the K-Menu icon (on the lower left corner of your screen), an applications list will appear. Under the section "Streaming":
- "Streaming->Net ok?" opens a new window running the mtr command
- "Streaming->Network card" where you can manually input network parameters, or run a new DHCP request, as explained in the DHCP and fixed IP section of this course
For bein able to establish a wireless connection, you should at least know its name (SSID) and the WEP password if the connection is encrypted.
On the StreamBOX live-cd you will be able to find an utility which can help you connecting to an access point: "KNOPPIX+Network/Internet->KWIFIManager", otherwise you can use "KNOPPIX+Network/Internet->Wavelan configuration"
Once you succesfully connected to an access point, you will still need the right Internet connection settings: run the DHCP-client again or give manual input with "Streaming->Network card configuration"